DIY Hex Nut Bracelet
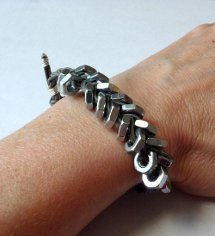
DIY Hex Nut Bracelet
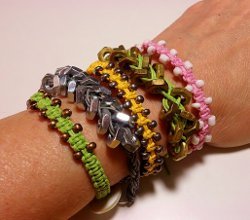
Everyone's going nuts for hex nut bracelets! Don't be the last to get in on the hardware store jewelry trend. Watch this video and learn the simple technique to make your very own DIY Hex Nut Bracelet.
Project TypeMake a Project
Bead TypeMetal
Time to CompleteIn an evening
Bead Project TypeBracelet

Materials:
- 18 small hex nuts
- 3 yards of leather cord
- scissors
- craft wire
- wire cutters
- flat nose pliers
- clipboard (or something to hold your work)
- two split rings
- one charm
- one small jump ring
- one closure of your choice
Instructions:
- Cut leather cord into three sections of approximately 1 yard each.
- Fold the three lengths of cord in half and loop (with half hitch) over split ring.
- Secure the ring on the clipboard and braid for 1 inch.
- Separate the cords into three sections of two.
- Thread a hex nut onto the far left cords and position nut close to base of braid; cross cords to center.
- Thread a hex nut onto the far right cords and position nut close to base of previous hex nut; cross cords to center.
- Repeat steps 5 and 6 for all 18 hex nuts.
- Braid for approximately 3 inches.
- Tie the left and middle sections, then the middle and right to secure.
- Fold the braided section onto itself approximately 1 inch and thread the end through the second split ring, positioning the ring at the fold.
- Using the loose cord ends, tie a knot at the base of the knot, securing both knotted end and bracelet.
- Using a piece of wire, wrap directly below the knot to secure. Flatten edges with pliers.
- Using another piece of wire, wrap the loose ends approximately 1 inch up and secure; flatten with pliers. Trim ends.
- On beginning split ring, open split ring gently and attach charm.
- Open jump ring; attach closure to open jump ring, and then open jump ring to the split ring with the charm. Close jump ring.
- Enjoy!
Read NextDIY Round Braid Leather Bracelets

