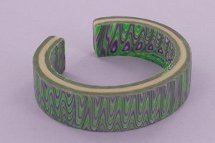
Swirled Cuff Bracelet
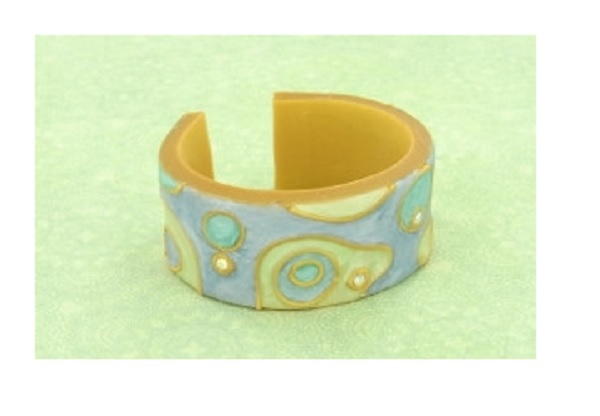
Get the look of gorgeous enamel for a fraction of the effort when you make the Swirled Cuff Bracelet. With the help of this DIY bracelet, you can show your mastery of clay craftsmanship. There's no need to sweat if you want the rich layers and glorious colors of enamel jewelry. With this polymer clay tutorial, you can have the look with just your own two hands and a baking oven. Grab your favorite colors of clay and give your bracelet making the royal treatment.
Project TypeMake a Project
Time to CompleteIn an evening
Bead Project TypeBracelet

Materials List
- Premo! Accents Clay: 18K Gold - 2 oz (1 block)
- Premo! Accents Clay: Pearl - 2 oz (1 block)
- Premo! Accents Clay: Peacock Pearl - 2 oz (1 block)
- Premo! Accents Clay: Bright Green Pearl - 2 oz (1 block)
- Premo! Accents Clay: Translucent - 2 oz (1 block)
- Premo! Sculpey® Clay: Ultramarine Blue Hue - 2 oz (1 block)
- Clay Conditioning Machine
- Clay Extruder
- Sculpey Acrylic Roller
- Sculpey® Super Slicer
- Premo! Sculpey® Cuff Bracelet
- Sculpey® Bake & Bond
- Waxed paper or deli wrap
- Craft knife
- Hot fix 3mm round crystals
- Alcohol swabs or rubbing alcohol and paper towels
Getting Started
Do not use unbaked clay on unprotected furniture or finished surfaces. Start with clean hands and work surface area. Good work surfaces include wax paper, metal baking sheet, or disposable foil. Knead clay until soft and smooth. For best results, clean your hands in between colors. Shape clay, pressing pieces together firmly. Bake on oven-proof glass or metal surface at 275 °F (130 °C) for 30 minutes per 1/4” (6 mm) thickness. For best baking results, use an oven thermometer. DO NOT USE MICROWAVE OVEN. DO NOT EXCEED THE ABOVE TEMPERATURE OR RECOMMENDED BAKING TIME. Wash hands after use. Baking should be completed by an adult.
Begin by preheating oven to 275 °F (130 °C). Test temperature with oven thermometer for perfectly cured clay. For best results, condition all clay by running it through the Clay Conditioning Machine several passes on the widest setting. Fold the clay in half after each pass and insert the fold side into the rollers first.
Instructions:
-
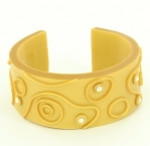
Make bracelet base from two #1 sheets of 18K Gold created with the Clay Conditioning Machine and rolled together with Acrylic Roller, cut to 1-1/4" x 6-3/4". Lay bracelet base on waxed paper. Spread a thin layer of Bake & Bond on the top surface. Using smallest spaghetti disk, extrude 18 K Gold strings. Make circles and designs on the bracelet base; pat lightly to adhere without distorting the clay. The Bake & Bond will bond the strings to the base. Add small balls of 18K Gold and press in hot-fix crystals. Wrap clay around outside of cuff bracelet form. Bake for 30 minutes and allow to cool completely.
-
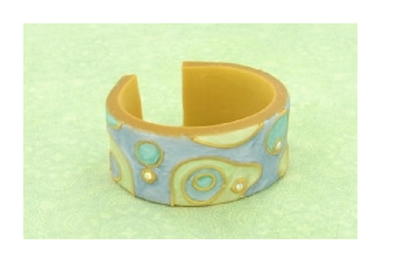
Mix ½ block Pearl and ½ block Translucent. Divide mixture in three. Add a pea-sized ball of Peacock Pearl to one part and mix thoroughly. Repeat with Bright Green Pearl and Ultramarine Blue to make three pastel colors. Press thin snakes and small balls into recessed areas between strings on bracelet surface, using one color per area. When all areas are filled with clay, smooth with your fingers, then wipe with alcohol swabs to remove fingerprints. Bake for 30 minutes. When completely cool, remove the bracelet from the cuff form and get ready for compliments!
Tips:
-
In Step 1, you might be tempted to add lots of strings and make lots of little areas to fill in. Leaving bigger areas really looks better and is easier to fill with raw clay in Step 2.
-
If you want more vibrant colors in the enamel areas, add colored clay a little bit at a time. A little bit goes a long way when tinting Pearl and Translucent clay.
-
Place most of the crystals in the middle of the strip – this section will be on top of your wrist and will show the most.

