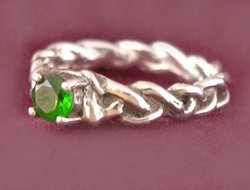
Braided Ring with Setting
Braided Ring with Setting
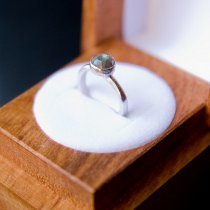
Metal clay jewelry designs, like this Braided Ring with Setting tutorial, give you the look of real silver jewelry at home. Follow these detailed free jewelry making instructions to create your own beautiful braided silver ring band. Set a birthstone in your new ring to make a lovely birthday gift for a friend.
Project TypeMake a Project
Time to CompleteWeekend project
Bead Project TypeRing

Materials:
- 10gm Art Clay Standard Slow Dry
- 5gm Syringe Type
- Green nozzle
- Empty syringe
- 4 mm round fine silver pronged setting
- Small glass of water
- Scissors
- Craft knife
- Paintbrush
- Sandpaper or sanding pads
- Chain nose pliers
- Wooden mandrel with stand
- Teflex strip
- Adhesive tape
- Hair dryer or similar
- Torch or Kiln
- Stainless steel brush
- Agate burnisher or tumbler
- Ring sizer
Instructions:
-
Use ring sizer to establish ring size. INCREASE THE SIZER 1½ SIZES TO ACCOUNT FOR SHRINKAGE WHEN FIRED. Place sizer on wooden mandrel and mark both sides with pencil. Remove sizer and center a strip of Teflex over the marks. Use scissors to cut a piece from the main strip and place over the marks, overlapping only 1/8 inch and taping in place with cellophane tape. Do not tape the Teflex to the mandrel but to itself. Make sure you can see the marks clearly through the Teflex.
-
Condition the Slow Dry in your hand for just a few seconds until it is soft and smooth. Roll into a ball and then form into a thin log.
-
Siphon clean water in and out of the syringe. Remove the plunger and shake any excess water out of the barrel.
-
Put the log of clay into the syringe and carefully insert the plunger, compressing the clay. If an air bubble becomes trapped, use a straightened paper clip to eliminate the air.
-
Place the syringe on the edge of the table on its plunger and press hard so that one long, extruded string of clay comes out intact. If there are any air bubbles or burps in the string, roll them out immediately.
-
Take the long string and dampen it immediately with a slight amount of water. Cut in thirds and pinch the top end.
-
Separate the right and left strands so that the three form a “T.” Begin to braid from the top, moving quickly and keeping the braid tight. When you come to the end, pinch the ends so the braid won’t unravel.
-
Wrap the braid around the Teflex so that the braid is right on the marks. Overlap the ends; take your craft knife and place on an angle just below one of the legs of the braid. Cut straight down and remove excess clay.
-
Put the two ends of the braid together so they match and then separate slightly. Insert a moderate amount of syringe type between the ends onto the Teflex and ease the ends together again, smoothing with paintbrush.
-
Place a small amount of syringe type onto the bottom of the 4mm round pronged setting and press firmly into the middle of the braid over the seam. Smooth with paintbrush. Dry thoroughly.
-
Use the sanding pads to smooth the braid and clean up the setting so no clay remains on the upper part to prevent the stone from being captured after firing.
-
Fire with torch or kiln. Brush first with stainless steel brush; then use agate burnisher or tumbler to create a shine.
- Set your 4mm round stone by closing diagonal prongs slightly. Then go back and rock the prongs so they sit snugly against the stone.
Read Next19 Colorful Memory Wire Bracelets

