Zipper Macrame Bracelet Tutorial
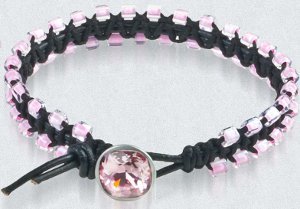
If you're on the hunt for new macrame bracelet patterns to try, end your search here with this Zipper Macrame Bracelet Tutorial. This tutorial is a new take on an old favorite, the square knot bracelet. These instructions will show you how to make beaded bracelets with a cool zigzagging zipper effect. Fans of macrame will definitely have to put this pattern on their list of must-makes. Choose beads in your favorite shade and add a matching sparkly button clasp to give your bracelet a bit of bling. It's the perfect summer accessory!
Project TypeMake a Project
Bead TypeSeed
Time to CompleteIn an evening
Bead Project TypeBracelet

Materials:
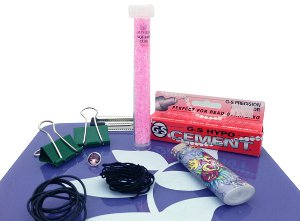
- 24 inches of 1.5mm leather cord
- 6 feet of 0.8mm knotting cord
- one button
- one tube of Miyuki 3mm cubes
- GS Hypo Cement
- clipboard
- nipper tool
- lighter or thread zap tool
-
two binder clips
Instructions:
-
Take both ends of your knotting cord and glue about 1 inch of each end. Let dry and cut on an angle.
-
Start by running your leather cord through your button and centering the cord. Now that you have two equal lengths of cord, clip your button to the top of you clipboard and your two pieces of leather cord to the bottom of your clipboard using binder clips. (It should look like the picture below before moving on.)
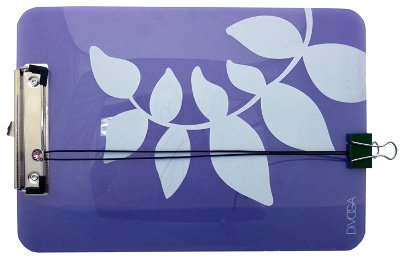
-
You are now going to start your square knots. Run your 0.8mm knotting cord under both of your leather cords, leaving 42 inches on the right side and 30 inches on the left side. Now let's begin our first knot (anchor knot).
>Right knotting cord over leather cord, and under left knotting cord.
>Left knotting cord under leather and up through the loop. Grab both ends of your cord and pull tightly.
-
Now that you have your anchor knot, you will add three additional knots.
>Take your left knotting cord over the leather cord and under the right knotting cord.
>Now your right knotting cord under the leather cord and up through your loop.
>Pull tight!
>Now take your right knotting cord over the leather cord and under the left knotting cord.
>Now take your left knotting cord under the leather cord and up through your loop.
>Pull tight!
>Now take your left knotting cord over the leather cord and under the right knotting cord.
>Now your right knotting cord under the leather cord and up through your loop.
>Pull tight!

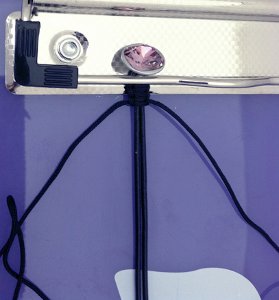
-
Release your button from the clipboard and push your knots close to your button. Clip your button back onto your clipboard. Pull cords tightly.
-
On your long piece of knotting cord, load your beads (approximately 75 for a 7-inch bracelet). Tie a loose knot at the bottom to keep your beads from falling off.
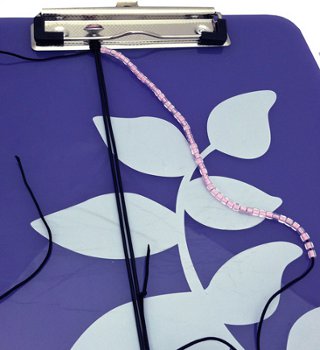
-
Push one bead up and take your right cord over the leather and under your left side cord. Now take your left cord under the leather and up through the loop. Pull tight!
-
Push up another bead; now take your left cord over your leather and under your right cord. Take your right cord under your leather and through the loop. Pull tight!
-
Repeat steps 5 and 6 until you have your desired length.
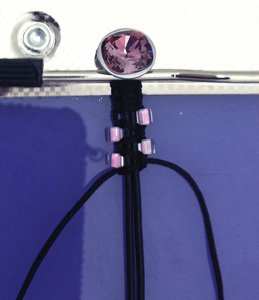
-
After adding your last bead, you'll make three more square knots (the same way you did in step 4).
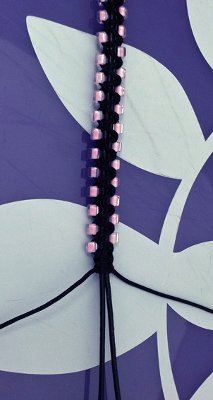
-
Unhook your bracelet from the clipboard.
-
Measure out a hole to fit the button you've chosen.
-
Tie a knot with your leather; pull tight.
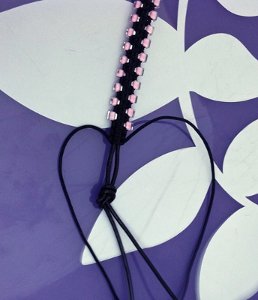
-
Glue your knotting cord knot.
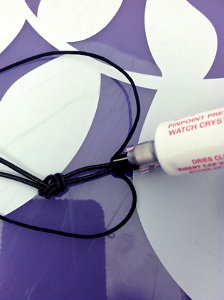
-
Glue your leather cord knot.
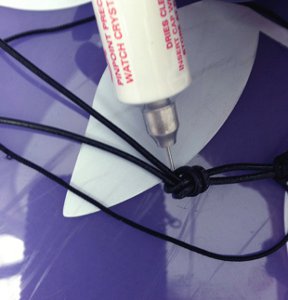
- Let dry. Nip off excess cord. Wear!
Read NextBeads and Knots Friendship Bracelets
Report Inappropriate Comment
Are you sure you would like to report this comment? It will be flagged for our moderators to take action.
Thank you for taking the time to improve the content on our site.

