Sparkling Snowflake Bead Necklace
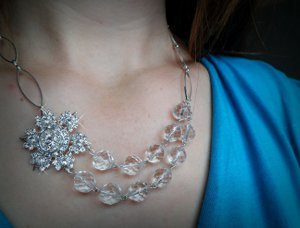
Be the shimmering star of every holiday party you attend this year with this Sparkling Snowflake Bead Necklace. This festive video tutorial will show you how to make a DIY necklace that will add some glam to your winter wardrobe. You will look like a sparkling snow queen all season long with this stunning crystal bead necklace adorning your collar. You can even try using this technique to create other jewelry projects featuring a focal bead or pendant and a multi-strand design. It's truly a breathtaking design that will be the highlight of your holiday look.
Project TypeMake a Project
Bead TypeCrystal
Time to CompleteIn an evening
Bead Project TypeNecklace

Materials:
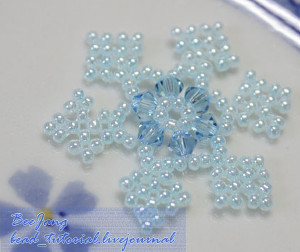
- a crystal snowflake (I am using a Swarovski 62027 silver-plated snowflake I purchased from Artbeads.com.)
- (11) 10mm round faceted crystal beads
- a toggle clasp
- 11 eye pins
- 1/2-inch of cable chain
- six jump rings
- chain of your choice (I am using a chain called "Silver-plated Large Oval Link Chain" I purchased from Artbeads.com.)
- long nose pliers
- wire cutters
- round nose pliers
- a ruler
Instructions:
- Slide a bead onto an eye pin. Form a loop and cut any excess wire. I can generally tell how much wire is needed to form a proper loop, so I usually just trim the excess wire prior to forming the loop. I find it easier that way.
- Repeat last step until you have all the beads on eye pins.
- Now it's time to form a beaded chain. First, open an eye pin loop. Then attach another beaded eye pin loop and close the loop. Continue like this to form a beaded chain. You will need to make two separate chains: one that has five beaded eye pin links and one that has six beaded eye pin links.
- Open a jump ring and attach it to one of the holes in the snowflake and the short beaded chain. Close the jump ring. Open another jump ring and attach it to the next hole below the previous one you attached the short beaded chain to; then attach the long beaded chain. Close the jump ring. Attach the 1/2 inch of cable chain to the eye pin loop on the opposite side of the long beaded chain.
- To find the lengths of chain you'll need, you first need to measure the snowflake and the shortest beaded chain. Mine turned out to be about 4 inches. You could also measure your clasp and any jump rings for more accurate finished measurements, but I will skip that part. Approximate measures, for me, are just fine. So I wanted a necklace that would be approximately 19 inches long when finished. So 19 - 4 = 15. I needed two chains, one for either side of the snowflake and beaded chain, so I just divided 15 by half and I came out with the two 7 1/2 inch lengths of chain I needed. Here's a tip: For accurate measurement of your chain, first measure out your chain with a ruler. Then for the second length of chain, count how many links are on the measured chain and go by that. Sometimes when measuring with a ruler, you will add or subtract a few links and this will show up on your design.
- Now that you are done measuring and cutting your chain, you will need to piece everything together. To do this, just open a jump ring, attach one length of chain, and attach both beaded chains. Close the jump ring. Open another jump ring, attach one length of chain, and attach the snowflake. Close the jump ring.
- The last step is to attach your toggle clasp. Open a jump ring; attach one end of chain and one half of your clasp. Close the jump ring. Do this with other end of chain and other half of the clasp.
Read NextShimmering Beaded Snowflake Pattern

