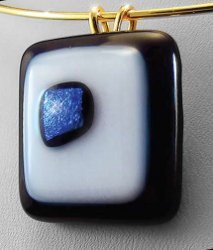
Spooky Glass Pumpkin Pendant
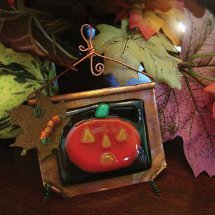
This Spooky Glass Pumpkin Pendant is so adorably perfect for Halloween that all your friends will be asking you to make them one. It's one of our favorite free jewelry making projects because it can used as more than just a pendant. Creating versatile DIY jewelry pieces is always a good thing. This pumpkin piece can be used throughout the whole Halloween season. As an added bonus, the shiny glass can give this homemade pendant an eerie glow. This cute DIY jewelry project is a must-have for the fall season.
Project TypeMake a Project
Bead TypeGlass
Time to CompleteIn an evening
Bead Technique UsedGlass Beadmaking
Bead Project TypeOther

This project was contributed by Diamond Tech.
Materials:
- Fuseworks™ Microwave Kiln
- Fuseworks™ Glass - Black and green opalescent, Orange and yellow transparent.
- Fuseworks™ kiln paper
- 2 ½” X 2 ½” Copper Sheeting .002 gauge
- Rusty Tin Maple Leaf
- 3 - 6mm Orange beads
- 8 ½” - 20 gauge copper wire
- 3 – 2” 26 gauge green wire
- Round nosed pliers
- Toothpick
- Fuseworks™ Glass Cutter
- Marker
- Scissors
- Safety glasses
- Torch
Instructions:
- Measure and mark pattern pieces on the following glass sheets: Black Opalescent Glass - background, Orange Transparent Glass - pumpkin, Yellow Transparent Glass – pumpkin face, Green Opalescent Glass – pumpkin stem
- Using a glass cutter, cut glass following pattern. Clean glass using paper towel moistened with water. Completely dry the surface of the glass with a lint free cloth.
- Next, cut a 2” X 2” piece of kiln paper. Remove the lid from the Fuseworks™ Kiln. Place the kiln paper on the kiln base.
- Position the black glass in the center of the kiln paper. Top with orange glass, centering it on the black.
- Add the yellow pumpkin facial features; if necessary use the image for positioning. Place the green pumpkin stem at the top of the pumpkin head. Carefully set the base with glass inside the microwave and cover with kiln lid. Fuse in a 1200 watt microwave at 50% for 2 minutes; 80% at 1 minute and 30 seconds. If using a microwave with a lower wattage increase the power level but keep the time consistent. PLEASE NOTE: All microwave and kiln combinations will have different firing patterns. Be sure to take careful notes and log all fusing times for future use.
- After time is up, open microwave and, using Hot Mitts, carefully lift the lid enough to inspect the fusing process. Add additional time in 30 second increments until desired results are achieved.
- Remove kiln from microwave using the Hot Mitts and place on a heat resistant surface. Cool the kiln for at least 30 minutes with the lid on. CAUTION: Removing the lid or peeking under the lid during the cooling stage will result in your piece cracking. Glass remains hot for a long time and should be handled with great caution.
- To patina the copper, work in a well ventilated area or outside; put the copper sheeting in a disposable plastic container with a lid. Spray the surface of the copper with vinegar. Add approximately two tablespoons of ammonia or Windex into the bowl and cover tightly with lid or a plastic bag for one hour. WARNING: Do not breathe fumes. When the patina process is complete; remove from the container and wash copper sheeting thoroughly.
- Using a round nosed pliers, “roll” ¼” of the copper sheet down from the top. This will create a tube like opening through which we will thread the hanger. Next, grab the two bottom corners with the pliers and roll up about 1/8”. Glue the fused Pumpkin head and a rusty tin maple leaf cut out to the copper using E6000 glue.
- Thread the 8 ½” length of copper wire through the top opening of the copper sheet. Bring both ends of the wire up so they meet. Make a loop at the end of one wire, pinch and hold. Wrap the remaining wire around the bottom of the loop to secure. Create decorative curls at the ends of each wire.
- To create the embellishments, wrap each green wire length around a tooth pick to create a spring. Slip 4 beads on to the end of one of the wire springs. Loop the end of the wire to hold the beads in place. Wrap the beaded spring around the leaf, see image for placement. Slip the remaining green springs into each curled corner to create tendrils.
For more versatile Halloween projects, be sure to check out collection of 22 Dark and Mysterious Jewelry Making Ideas!
Read NextLittle Charmer Bracelet
Your Recently Viewed Projects
mulberrygalprinces s
May 25, 2017
What a fun, easy project. I live in Florida so sea glass won't be hard to come by. And after reading thru the directions, it's very easy to do. So let me see, easy, pretty and very inexpensive . That fulfills all the requirements I have for any DIY project. This is one that we can wear year around in Florida too. Thank you so much for sharing it. And for free too!
Report Inappropriate Comment
Are you sure you would like to report this comment? It will be flagged for our moderators to take action.
Thank you for taking the time to improve the content on our site.

