Out on the Town Pearl Bracelet

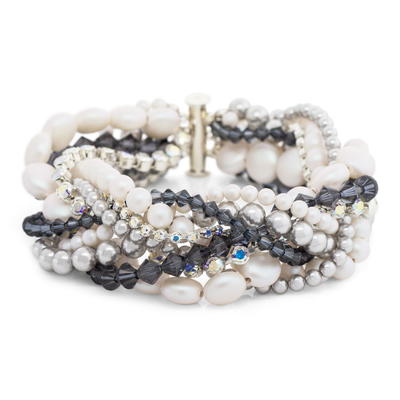
This Out on the Town Pearl Bracelet is the perfect glam accessory for a night out with girlfriends or a fancy date with a special someone. Especially during wedding season, this DIY bracelet can really come in handy! Slip this beaded bracelet onto your wrist for an instantly layered and chic look that pulls together any outfit in no time. Learn how to make a bracelet that is sophisticated and fun all in one. The pearls mix with the crystal accents in an interwoven DIY jewelry look that will stun onlookers!
Project TypeMake a Project
Bead TypeCrystal, Pearl
Time to CompleteUnder an hour
Bead Technique UsedStrung
Bead Project TypeBracelet

Materials List
- 62 - 4mm Graphite Swarovski Crystal Bicone Beads (04BI1502)
- 38 - 6mm Graphite Swarovski Crystal Bicone Beads (06BI1438)
- 56 - 4mm Pearlescent White Swarovski Crystal Pearl Beads (PL7389)
- 56 - 4mm Light Grey Swarovski Crystal Pearl Beads (PL5016)
- 38 - 6mm Pearlescent White Swarovski Crystal Pearl Beads (PL7391)
- 38 - 6mm Light Grey Swarovski Crystal Pearl Beads (PL5316)
- 22 - 10mm Pearlescent White Swarovski Crystal Coin Pearls (PL7398)
- 9 inches - 3mm Silver Plated Crystal AB Round Bezel Swarovski Crystal Rhinestone Chain (CN9529)
- 9 inches - 4.5mm Silver Plated Crystal AB Round Bezel Swarovski Crystal Rhinestone Chain (CN9509)
- 1 - 10x19mm Three Strand Silver Plated Brass Magnetic Tube Bar Clasp (BM0534)
- 2 - 7x3mm Silver Plated Spring Ring Chain Ends for Crystal Rhinestone Chain (BM4092)
- 2 - 8.5x3.5mm Silver Plated Spring Ring Chain Ends for Crystal Rhinestone Chain (BM4093)
- 4 - 4mm Silver Plated Base Metal 20 Gauge Open Jump Rings (BM2747)
- 14 - 2x2mm Sterling Silver Crimp Beads (SS4047)
- 14 - 3.5mm Sterling Silver Crimp Bead Covers (SS2103)
- 7 feet - Clear Soft Flex Wire .014" Diameter (SM0310)
- Wire cutters
- Crimping pliers (TL0500)
- Chain Nose Pliers
- Bead stoppers
Instructions
-
Using wire cutters, cut the beading wire into seven 12-inch lengths.
-
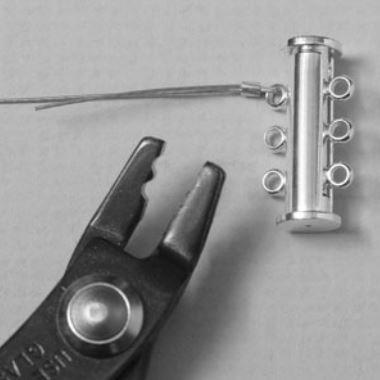
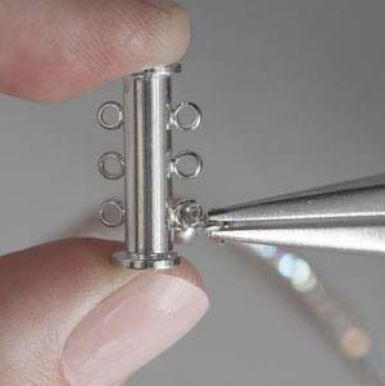
Place one crimp bead and the first loop on one side of the tube bar clasp onto a 12-inch length of beading wire. Pass the wire back through the crimp bead, and crimp the crimp bead. Cover the crimp bead with a crimp cover, and trim excess wire with wire cutters.
-
Repeat Steps 1 – 2 twice, attaching two more lengths of beading wire to the same loop on the same side of the tube bar clasp.
-
In the same manner as in Step 3, attach two lengths of beading wire to the second loop on the same side of the tube bar clasp.
-
Repeat Step 4 on the third loop.
-
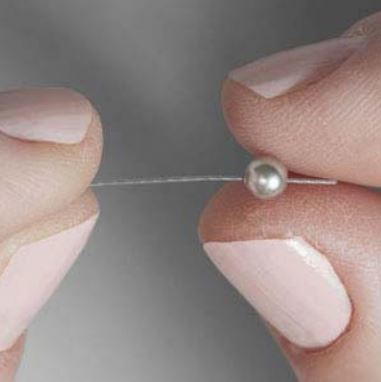
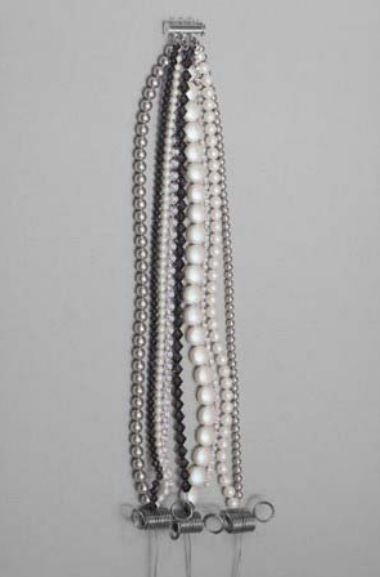
String 56 4mm Light Grey pearl beads onto the first beading wire strand. Use a bead stopper to temporarily secure the end of the wire.
-
In the same manner as in Step 6, string these beads onto each of the remaining strands of beading wire (one type of bead per strand). Secure each strand temporarily with a bead stopper after stringing:
38 – 6mm Pearlescent White pearl beads
22 – 10mm Pearlescent White coin pearls
38 – 6mm Graphite bicone beads
56 – 4mm Pearlescent White pearl beads
62 – 4mm Graphite bicone beads
38 – 6mm Light Grey pearl beads -
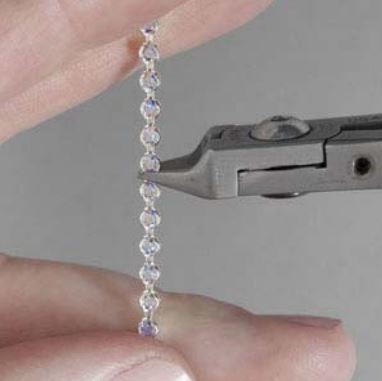
Using wire cutters, cut a 9-inch length of 3mm Crystal AB round bezel rhinestone chain. Repeat with the 4.5mm Crystal AB round bezel rhinestone chain.
-
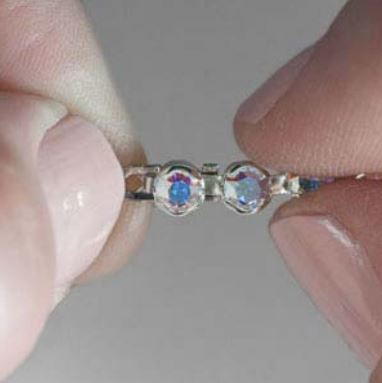
Use one smaller chain end to attach one end of the 3mm rhinestone chain to the second loop on the same side of the tube bar clasp used previously. Repeat with a larger chain end to attach the 4.5mm rhinestone chain to the third loop.
-
Lay the strung strands onto the work surface vertically. Use one bead stopper to secure the first two strands, a second bead stopper to secure the second two strands, and a third to secure the remaining strands.
-
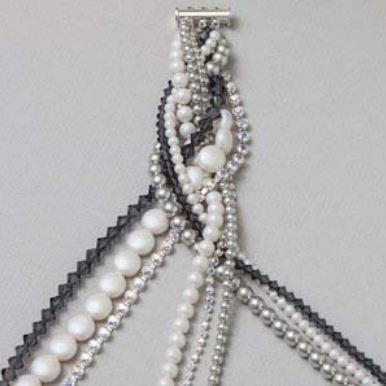
Braid the groups of strands loosely.
-
Remove the bead stoppers. Crimp the free ends of the beading wires to the loops on the second side of the tube bar clasp. Cover the crimps with crimp covers. Use the remaining chain ends to attach the rhinestone chains to the clasp.

Read NextSunrise Cali Band


Thanks for your comment. Don't forget to share!
Hippie Chick
Jan 17, 2018
This tutorial has a lot of step by step pictures with explanations. This is exactly the way I like to see tutorials presented to us on your site. Also, instead of including a link that takes us off your site to find the pattern, we are given a link to directly download it. Kudos.
mulberrygalprinces s
Apr 21, 2017
Who can't use a simple Pearl bracelet? This is a very easy project. You can add or remove pieces, it's your choice. Plus think of mixing other colors with it. Red with pearls for valentines Day, red and green for the winter holidays. I want to make one with purple and pearls. My to do list is so long I will have to live to be 100 to get them all done. That's some incentive I think.
Report Inappropriate Comment
Are you sure you would like to report this comment? It will be flagged for our moderators to take action.
Thank you for taking the time to improve the content on our site.