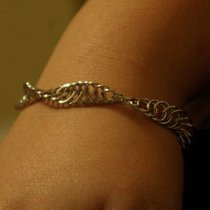
Cabbage Patch Bracelet
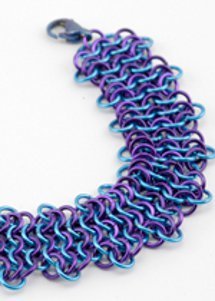
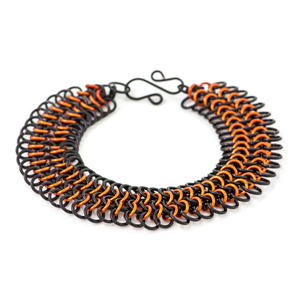
The movement in this Cabbage Patch Bracelet is what makes it so fun and easy to wear. The increasing and decreasing lines make it one of our more fun chain mail patterns. Make it with colored jump rings or simple silver!
Project TypeMake a Project
Time to CompleteWeekend project
Bead Technique UsedChainmail/Wirework
Bead Project TypeBracelet

Materials:
- 20 gauge Orchid (S07) Artistic Wire® cut into
- 150 1/8” (3.18mm) ID jump rings (A)
- 20 gauge Peacock Blue (S01) Artistic Wire® cut into 135 1/8”(3.18mm) jump rings(B)
- Gunmetal Lobster Claw Clasp
- 2 pair of either chain nose pliers
- Flat nose pliers
- Bent nose pliers or any combination of pliers
Instructions:
- Take one open (A) jump ring and scoop up your clasp and two closed (B) jump rings.
- Grasp the clasp and the (A) jump ring using the side of your index finger and your thumb of your non-dominant hand, flip the two (B) jump rings up to make what looks like mouse ears. Make sure the mouse’s forehead, the (A) jump ring, is in front.
- Take one open (A) jump ring and enter the mouse’s right ear, (B) jump ring added in step 1, from the front and go around his head in the back and come back up through his left ear, the other (B) jump ring added in step 1, from the back. Before closing the (A) ring, add two closed (B) rings.
- Make “mouse ears” from the four closed (B) rings, the two from step 1 and the two from step 3.
- Take one open (A) jump ring and scoop up the two (B) jump rings you added in step 3, using the same method of entering the mouse’s right ear, (B) jump ring, from the front and go around the mouse’s head in the back and come back up though his left ear, the other (B) jump ring, from the back. Before closing the (A) ring, add two closed (B) rings.
- Repeat the process: a) Make ”mouse ears” b) With one open (A) ring, scoop up the two most recently added closed (B) jump rings c) Add two closed (B) jump rings
- Repeat step 6 until the bracelet is the desired length less the length of the clasp. Putting “Wings” On The “Mouse Ears”:
- Turn the bracelet horizontal with the right row of “mouse ears”, (B) jump rings, pointing up.
- Take one open (A) jump ring, scoop up two of the “mouse ears” (the side (B) jump rings). Close the jump ring.
- Take one open (A) ring, scoop up one new “mouse ear” (B) and the “mouse ear” (B) first scooped in step 9. Close the (A) jump ring. The new (A) jump ring will sit in front of, or on top of the (A) jump ring added in step 9.
- Repeat step 10 all the way down the side. Each new (A) jump ring will sit in front of the previous (A) jump ring added.
- Flip the bracelet over and repeat steps 9 - 11. Except this time, the (A) jump rings will sit behind the previous(A) jump ring added. Making Cabbage:
- Again, turn the bracelet horizontal. This time you will be picking up 3 (A) jump rings at a time with an open (B) jump ring.
- Take an open (B) jump ring and scoop up the (A) jump ring you added in step 9, the (A) jump ring you added in step 10, and the (A) jump ring you added in step 11.
- Repeat steps 13 - 14 all the way down the side. Turn the bracelet over and do the same thing to the other side. Finishing The Bracelet:
- On the end opposite the lobster claw clasp add a chain of alternating (A) & (B) jump rings. This will serve as a sizing adjustment for the bracelet. Add a mobis or “love knot” to the end.
Read NextSparkly Statement DIY Bracelets
Your Recently Viewed Projects
The Designing Peng uin
Sep 04, 2016
What a fun bracelet! Great with jeans or a summer skirt or dress or any casual outfit and would comfortably make the transition to winter.
MissMaggie
Oct 27, 2011
Hey GREAT38YER 2549144, you can always copy and paste all the steps into a Word document that you can save on your computer and access at any time. Glad you like the tutorial! -Editors of AllFreeBeadedJewelry
GREAT38YER 2549144
Oct 15, 2011
Great Bracelet! would be nice if I coud save the web page so as to wort offline.
Report Inappropriate Comment
Are you sure you would like to report this comment? It will be flagged for our moderators to take action.
Thank you for taking the time to improve the content on our site.

