Simple Ring Bracelet Tutorial
By: Natalie from Pinx Jewelry

Simple Ring Bracelet Tutorial
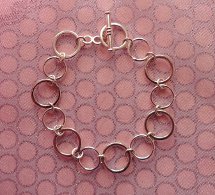
Make an easy bracelet design to complete any outfit with this Simple Ring Bracelet Tutorial. This basic bracelet can be worn alone or used as a foundation to make a beaded charm bracelet. Add beads and charms as you please--the possibilities are endless!
Project TypeMake a Project
Time to CompleteUnder an hour
Bead Project TypeBracelet

Materials:
- 2 pairs of chain nose pliers
- 7 closed rings, 12mm inside diameter
- 6 closed rings, 10mm inside diameter
- 13 jump rings, 3.75mm inside diameter
- 1 toggle
Optional materials for embellishing:
- charms
- beads
- jump rings (1 for each charm and each bead)
- headpins (1 for each bead)
- round nose pliers
- wire cutters
Instructions:
- Starting with a large ring, set out your pattern on a flat surface, alternating between the larger and the smaller closed rings.
- Connect the rings together using one jump ring for each connection.
- Attach the toggle using a jump ring. If you do not wish to attach any accent beads or charms, then you are finished. Continue on for steps to customize your bracelet.
- Thread each accent bead onto a headpin and snip off excess wire, leaving approximately ½ inch of wire above the bead.
- Use your round nose pliers to form a loop and continue until the loop is closed. Repeat for each accent bead. Attach a jump ring through the loop.
- If using charms, simply attach a jump ring to each charm and leave open.
- Attach each charm or accent bead with a jump ring to the bottom of the ring on your bracelet that you want it to dangle from.
- Repeat until it is exactly how you like.
- Enjoy!

