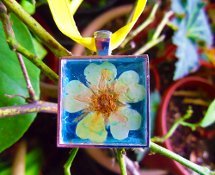
Pressed Flower Pendant Video Tutorial
By: Catherine Fox

Pressed Flower Pendant Video Tutorial
Preserve your favorite flowers forever with this Pressed Flower Pendant Video Tutorial! Making pressed flower jewelry is super easy; you can make this project in just a few simple steps. Use this technique to save flowers from a special occasion, like a wedding or prom, or use a friend's favorite flower and give it as a gift!
Project TypeMake a Project
Time to CompleteUnder an hour
Bead Technique UsedStrung
Bead Project TypeNecklace

Materials:
- small pressed flowers or leaves (you can purchase them or you can press them yourself)
- a pendant back
- epoxy dots in the same size as your pendant back
- paper, color of your choice
- ribbon necklace or chain
- scissors
- a pencil
- glue
- toothpicks
Instructions:
- Trace around your pendant back on your paper; cut it out. Trim the edges to fit the paper inside the pendant.
- Glue the paper to the inside of your pendant. Press the paper down firmly to adhere it to the pendant.
- Apply a tiny amount of glue to your pressed flower and/or leaves and place them on your paper inside the pendant. Let dry completely before moving on to the next step!
- Apply your epoxy dot to your pendant by peeling away the backing and pressing it firmly to the pendant. The epoxy dot is like a sticker so be careful when using to avoid any fingerprints. Make sure all the edges are pressed firmly down.
- Attach your pendant to the ribbon/chain necklace.

