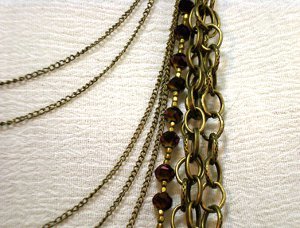
Multi Strand Chain Necklace Tutorial
By: Sandy Huntress for AllFreeJewelryMaking

Multi Strand Chain Necklace Tutorial
Get the layered look instantly with this Multi Strand Chain Necklace Tutorial. DIY jewelry that looks like multiple stacked accessories has been all the rage lately, and with these jewelry making instructions, you can create the effect yourself. It's easy! Just combine multiple chains in the same color palette for an edgy and eclectic effect. This video tutorial will show you how.
Project TypeMake a Project
Bead TypeMiscellaneous
Time to CompleteIn an evening
Bead Project TypeNecklace

Materials:
- 74-inch length chunky chain, cut into 45-, 15- and 14-inch pieces
- 55-inch length fine chain, cut into 12.5-, 12-, 11-, 10- and 9.5-inch pieces
- lobster clasp
- 13 inches of beads and spacers, strung on 17 inches tiger tail or other beading wire
- two crimp beads
- two split rings
- 5mm jump rings
- two pair chain nose pliers
- crimping pliers, if desired
- wire cutters
- four pieces scrap wire or four twist ties
Instructions:
- Mark 45-inch length of chain at 9.5 inches and 13 inches from each end with scrap wire or twist ties.
- Attach each end of 15-inch length of chain to a link at the 13-inch marks on the 45-inch chain.
- Attach ends of 14-inch length of chain each one link above 15-inch length.
- Slide a crimp bead and a split ring onto one end of tiger tail with strung beads. Slide wire back through crimp bead. Flatten with chain nose pliers, or crimp with crimping pliers. String extra wire through ½ inches of beads; then trim excess.
- Repeat step 4 to attach split ring to other end of tiger tail.
- Attach strung beads to 45-inch length of chain by split rings in same manner as 14- and 15-inch lengths of chain.
- Use jump rings to attach lengths of fine chain to 45-inch length of chain in same manner, working up the links, starting with longest length and spacing evenly to place shortest length at mark at 9.5 inches.
- Use a jump ring to attach lobster clasp to one end of 45-inch chain.

